Making a board
The Board Editor builds boards of your own, ready to play. What you make can be exported and handed to someone, or published from the editor itself.
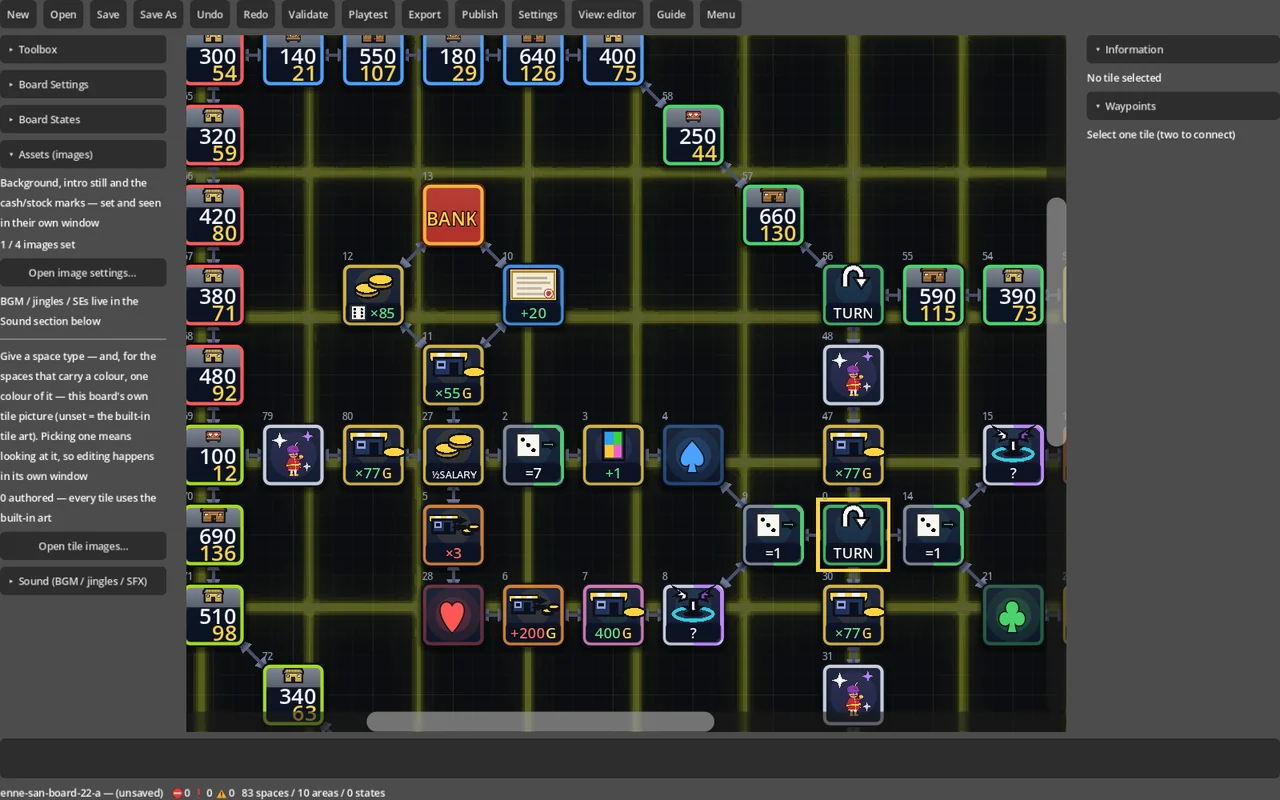
Open it from the main menu → Board Editor (PC only — it is not offered on a phone). The first time, you get a new board holding a single bank square.
The guide runs in the order you will need it: the screen → a first board → squares and districts →board settings → board states → art and sound → validating and saving → publishing. Read it top to bottom to build one board, or jump to §11 when something is wrong.
1. The screen
| Where | What is there |
|---|---|
| Top menu | Getting boards in and out, plus validate, play-test, publish and the rest (→ §1a) |
| Left panel | Toolbox, board settings, board states, assets (images), sound (click a heading to fold it) |
| Canvas | The board itself. Wheel zooms, middle-drag pans (the scroll bars work too) |
| Right panel | The selected square's Information and its waypoints (routing) |
| Bottom dock | Validation results. Click one to jump to that square |
| Bottom line | The board's ID, whether it is saved, the ⛔❗⚠ counts, squares, districts, the state on view, and the last autosave |
Select several squares and the info panel's fields apply to all of them at once (the values shown are the first square's; ID and coordinates stay single-selection only).
1a. The top menu
| Button | What it does |
|---|---|
| New / Open | Start a new board / open one from the board list (anything not listed: "Open from a file…") |
| Save / Save As | Write the file (→ §9) |
| Undo / Redo | The same as Ctrl+Z / Ctrl+Y |
| Validate | List the board's problems in the bottom dock (→ §9) |
| Playtest | Play the board as it is right now (F5) |
| Export / Publish | Write a file to hand over / publish to the official server (→ §10) |
| Settings | The editor's own settings (→ §12) |
| View: editor | Press it for View: game: the arrows, square IDs and start badge go away, and the squares are sized and spaced exactly as a match draws them. Press again to come back |
| Guide | Opens this page |
| Menu | Back to the main menu (Ctrl+W) |
The Open list shows each board's current version (the version it was published as) on the right. "-" means it has never been published.
1b. The toolbox
| Item | What it is |
|---|---|
| Category / Type | The kind of square you are about to place (→ §4). A short explanation of it appears underneath |
| Place mode | Tick it, then click an empty spot on the canvas to place a square |
| Delete selected tile(s) | Removes the selection (the same as Del) |
| On ID change | What renumbering a square does: Swap IDs = the two squares trade numbers / Shift IDs = the numbers in between shift to make room |
| Auto-Path (connect adjacent tiles) | Connects neighbouring squares in bulk (P) — the selection, or everything if nothing is selected |
| Reset all routing to Auto | Throws away every hand-written waypoint and goes back to the automatic table |
| Auto-connect (on place/move) | Whether placing or moving a square joins it to its neighbours by itself |
| Remove all unresolved links | Deletes every connection that has nothing at the other end |
| Placement step | The smallest step squares are placed and moved by (→ §3) |
| Show background | Off / Faint / Full. Lays the board's background picture under the canvas — for placing squares against the art |
| Areas (stock price) | The district list, with add, delete and assign (→ §5) |
2. Your first board — nine steps
- Open the Board Editor
- Pick a category and a type in the toolbox (e.g. category "Shops" → type "Shop")
- Tick Place mode and click the canvas. Squares placed next to each other connect by themselves
- Close the loop all the way round (→ §3)
- Click a shop and give it a price (the fee is worked out for you)
- Assign the shops to districts in the left panel (→ §5)
- Name the board in board settings (the English name is required; the Japanese one falls back to it)
- Press Validate and clear every ⛔ and ❗
- F5 to play-test, then Ctrl+S to save
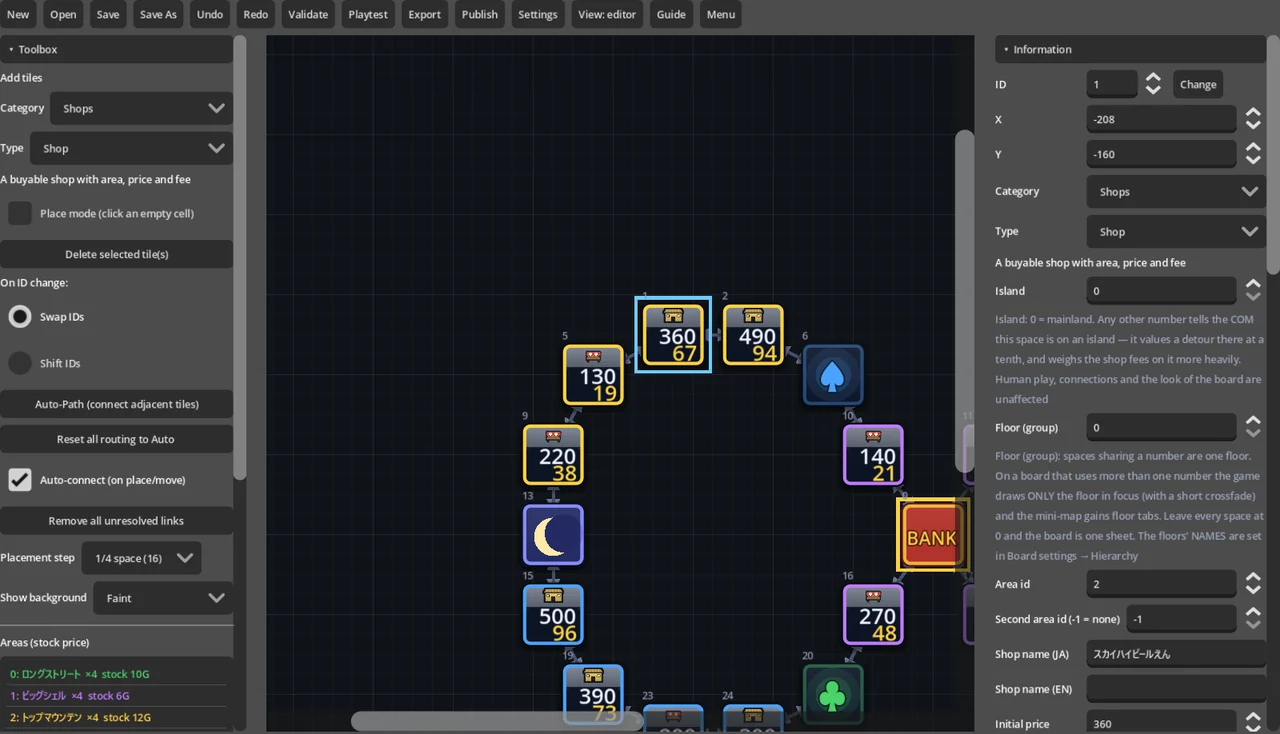
Square 0 is the start. The bank a new board comes with is square 0, so a match normally starts on that bank.
3. Placing and connecting
| To do this | Do that |
|---|---|
| Select | Click (Ctrl+click adds, drag selects a range) |
| Place | Turn on Place mode and click an empty spot |
| Move | Drag (hold Ctrl for single-unit steps) |
| Delete | Del (or "Delete selected tile(s)") |
| Undo / redo | Ctrl+Z / Ctrl+Y |
| Connect in bulk | Auto-path (P) — the selection, or everything if nothing is selected |
| Renumber | Type a number into the right panel's ID field and press Change (swap or shift is the toolbox's "On ID change") |
3a. Where squares go — the 64 grid
- Neighbouring squares are 64 apart. Coordinates are measured on that grid (0, 64, 128 …)
- Placement step defaults to 1/4 square (16). At 1 square (64) every square sits exactly on the grid. Make it finer (1/8 …) and a faint grid at that size appears on the canvas
- Placing near an existing square snaps onto its grid, so "next to it" really is next to it and the connection appears by itself (hold Ctrl to place without snapping)
- A square half a step off does not auto-connect. When something will not join up, this is usually why
- Coordinates go up to ±32000 (500 squares). Place out at the edge and the scrollable area grows by itself
- Delete a square and every reference to it — a warp's destination, a door's exit — is tidied up for you
3b. Connections and waypoints
The connections between squares are the roads the pieces walk.
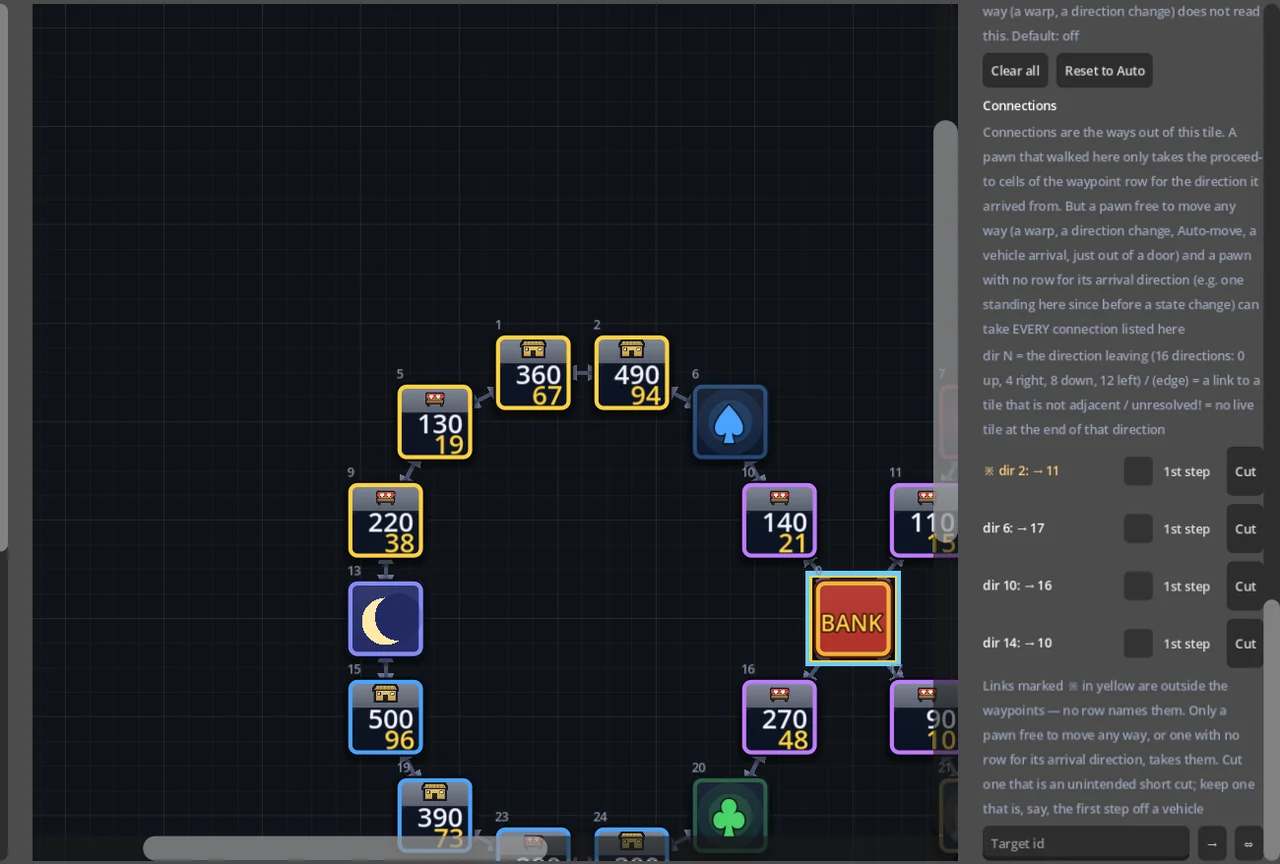
- Automatic — squares placed next to each other (straight or diagonal) connect the moment they are placed. Auto-path re-joins everything in bulk
- By hand (two squares) — select two squares and the waypoint panel offers A→B / A←B / Bidirectional
- By hand (by ID) — select one square, type the other's number into Target id under the waypoint panel, then → (one way) or ⇔ (both ways)
- A connection to a distant square becomes a dashed arrow, visible in the game too
- To remove one, press Cut on its row in the waypoint panel's connection list
Waypoints are a table of "coming from here, you may go there". It is automatic unless you touch it.
- One row = one direction of arrival. The table is keyed on which way a piece was moving, not on which square it came from
- Each row is From ids → To ids (comma-separated, up to eight). Writing a "to" id that is not connected yet creates the connection too
- A row's Clear removes it, Clear all removes every row, and Reset to Auto goes back to the automatic table
- A row with an empty "from" field is for pieces that may go any way at all — a warp, a turnaround, a "pick your route" card. A piece that walked in never reads it
- Tick Dead end and a piece arriving that way cannot go on. That is how a deliberate cul-de-sac is made (if another route still lets the piece stop, the dead end stays closed)
- A connection marked with a yellow ※ in the list is not in any row's "to" list. A piece that walked in never takes it; if it is a shortcut you did not mean, Cut it
3c. Loops (joining the far edges)
A loop is not something you draw — it follows from where the squares are.
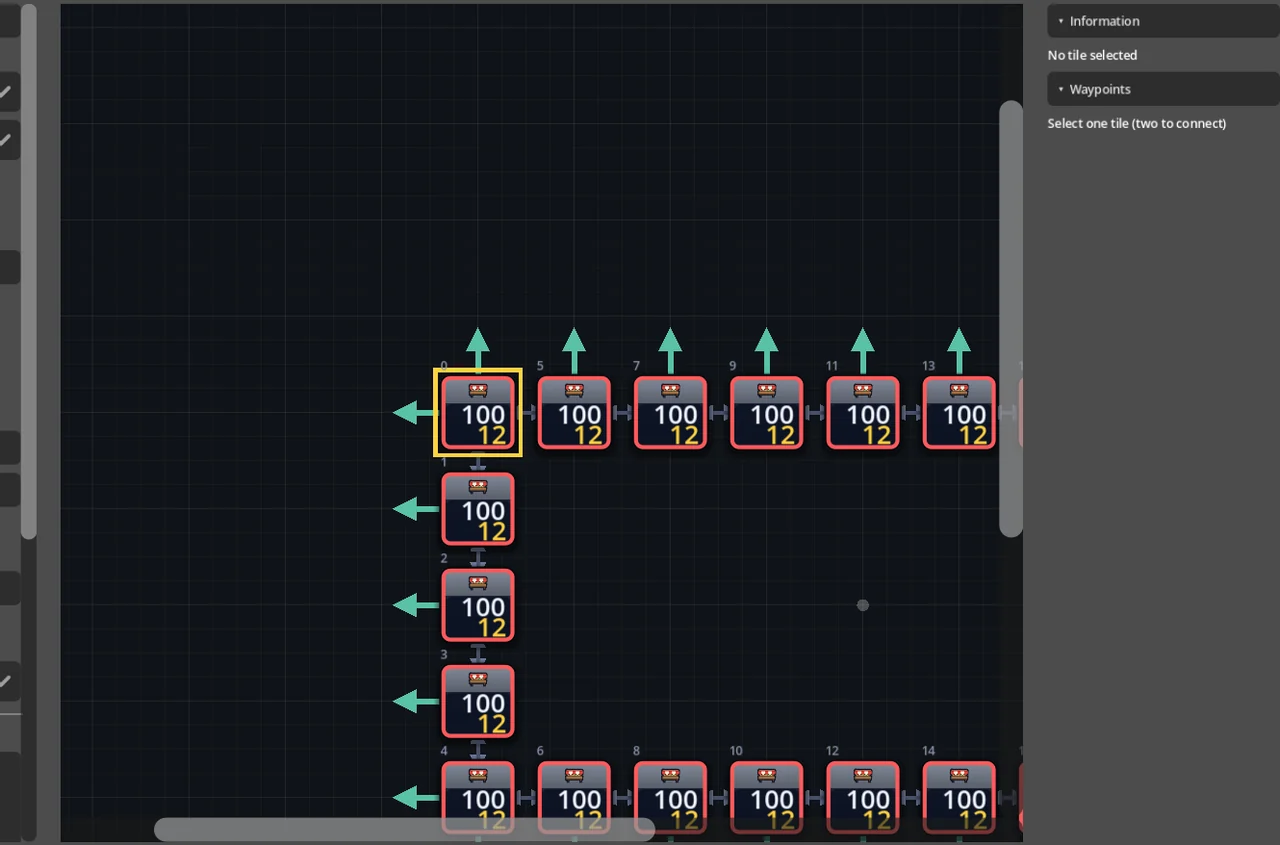
- Pick vertical / horizontal / both in board settings → Board. Press it again even if it already looks picked
- Line the edges up — a column joins only when its top square is on the board's topmost row and its bottom square is on the bottommost one (left and right likewise)
- Press auto-path. A seam is drawn as a green arrow pointing off the board
⚠ Never draw a seam by hand. A hand-drawn line becomes a dashed edge across the board and occupies the exit slot the seam needs — the more you connect by hand, the less the loop works.
- Pick a loop that never wraps and validation shows ⚠. The cause is nearly always step 2
- In a match, a piece walks the seam just as drawn: out at one edge, in at the other
4. Square types
Pick them under Category → Type in the toolbox. To change a placed square, pick another type in the info panel.
| Category | Type | What it does |
|---|---|---|
| Shops | Shop | A shop to buy. Has a district, a price and a fee (→ §5) |
| Vacant lot | An empty lot to build on | |
| Bank & stocks | Bank | Pays salary once all four suits are collected. Arrive with the goal reached and you win |
| Stockbroker | Buy shares in a district. Whether passing is enough, or you must stop, is set per square | |
| Marks | ♠ ♥ ♦ ♣ | Grants that suit |
| Changing Mark | The suit changes every time a piece passes. Set the starting suit | |
| Chance & Events | Chance | Draw a chance card |
| Event | Fires the event ID you set (typed in as a number) | |
| Bonus & Rest | Lucky / Super Lucky | Until your next turn, take 20% / 50% of the fees other players pay |
| Dice / Casino | Roll again and keep moving / a minigame | |
| Rest | The lander's shops close for one round (fee 0) | |
| Transport | Warp | Moves to the square you name. Three ways to treat the arrival square's effect |
| Cannon | Fires you to another player (choose / nearest / random) | |
| Door / Door Exit | Entering spends the rest of the roll and leads to the exit for that way in | |
| Stairs (up) / Stairs (down) | Between floors (boards using floors only — → §4c) | |
| Vehicle / Vehicle (No Vehicle) / One-Way Vehicle Exit | Ride to a destination (→ §4b) | |
| Gimmick | Switch | Stopping on it switches the board state (→ §7) |
| Switch (on pass) / (on pass, at once) / (on pass + chance) | Switches that fire just by being crossed (→ §7) |
- To make a warp two-way, simply point the other warp back at this one
- Squares other than shops can be named too (the info panel's Name JA / Name EN). The name — "Shell Bank", say — shows in the square's in-game info and wherever a destination is listed. Leave it empty and the type's own name is used. One language is enough
- Types that carry a colour (warps, doors, cannons, switches, vehicles…) can have tile art per colour (→ §8)
4a. The info panel
Click a square and its settings line up in the info panel on the right. Every type has these:
| Field | What it is |
|---|---|
| ID / X / Y | The square's number and coordinates (single selection only) |
| Category / Type | Re-pick the type |
| Island | 0 = mainland. At 1 or more, CPU players treat the square as an "island" and dislike detours to it (people, connections and looks are unaffected) |
| Floor (group) | Which floor the square is on (→ §4c) |
Below them come the type's own settings (a shop's price and fee, a warp's destination…).
4b. Vehicles
A vehicle square takes its style, role, destinations and line id, and its arrival (now / next turn), in the info panel.
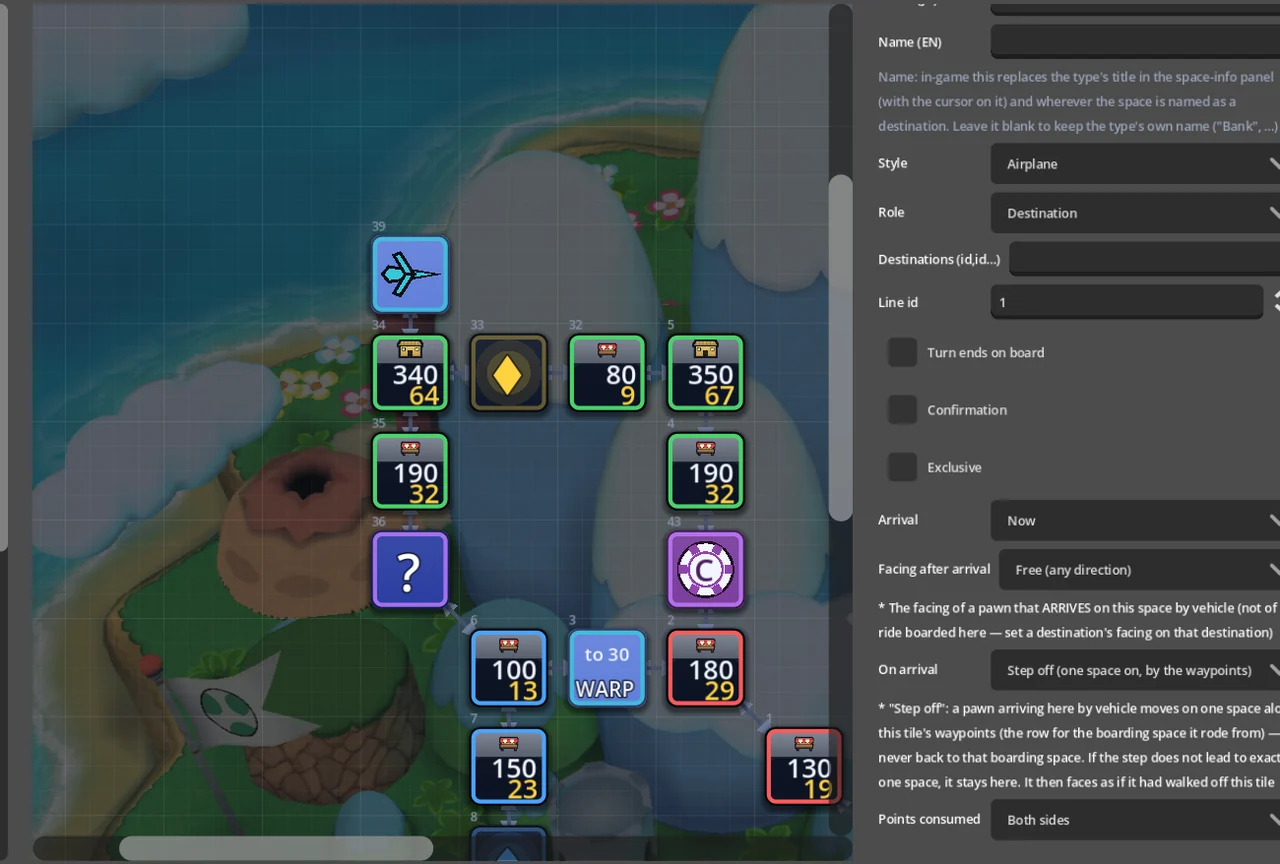
- Turn ends on board / Confirmation / Exclusive — whether boarding ends the turn, whether the player is asked first, and whether only one rider at a time
- Facing after arrival — shown when you select a square a ride arrives on (shops too). "As if from square N" makes the arriving pawn move on as if it came from there. A boarding square lists the facing at each destination (set it on the destination itself)
- On arrival: Step off — a pawn arriving on a vehicle tile moves on one square. If the step does not lead to exactly one square it stays (validation shows ⚠). It can also be changed from the boarding square's list
- While someone is riding a "next turn" vehicle, other pawns cannot walk onto its boarding square
4c. Floors and stairs
Turn floors on in board settings → Board, and each Floor (group) number becomes a floor of its own.
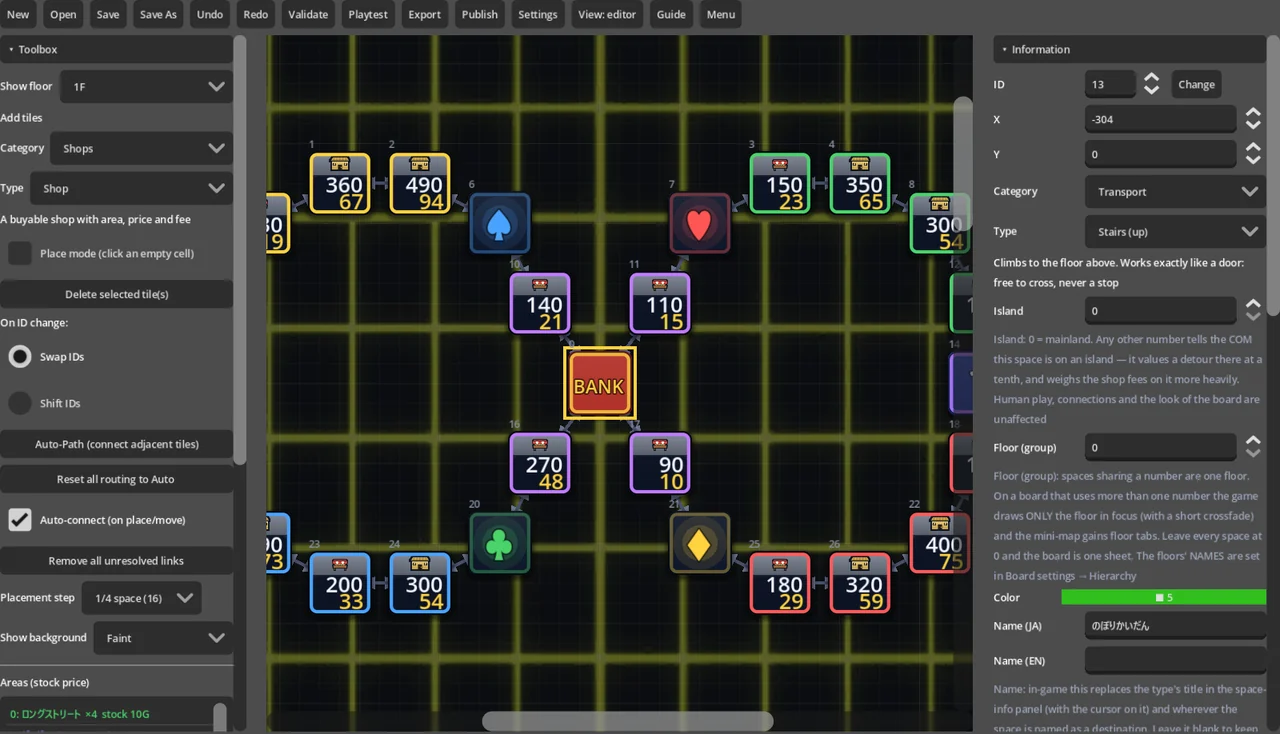
- In a match, only the floor the piece is on is drawn (the mini-map grows floor tabs)
- Board settings give each floor a short name (shown on its tab), and each floor can have its own background (→ §8)
- Show floor appears at the top of the toolbox. The chosen floor is drawn clearly (the others stay faint), and squares placed in place mode go onto it
- Floors are joined by Stairs (up) / Stairs (down) — the mechanism is a door's: free passage, never a stop. Place them in pairs and put the partner's square ID in the info panel's Stairs destination (it must be on another floor). Forget it and validation shows ⚠
5. Districts and shops
- Add area, then select shops and press Assign selection
- Delete area removes the selected district. The districts after it move up by one, and their shops follow (a district that still holds shops or lots cannot be deleted)
- District names also require English
- Share prices are derived from the district's properties (the list shows "×count, stock price")
- A shop can sit in two districts. Select it and type a number into the info panel's Second area id (-1 = none). Which of the two its shopping fee and capital ceiling are read from is the Two-area shop multiplier rule (see "Legacy and Modern")
5a. A shop's price and fee
- Enter a shop's Initial price and its Initial fee is calculated for you (the Auto-Calc tick). Untick it to type the fee by hand
- Yield underneath is the fee as a share of the price (display only)
- Leave the shop's name (Shop name (JA) / (EN)) empty and it gets a price-as-name such as "Initial Value 360" that follows the price when you change it. Write a name and it stays
5b. Opting squares out when a rule rewrites the board
A square can be left out of the two rules that rewrite a board when a match starts (shuffle and vacant lots), and out of random warp destinations. That is how a landmark shop, or a cheap shop for beginners, stays as you placed it.
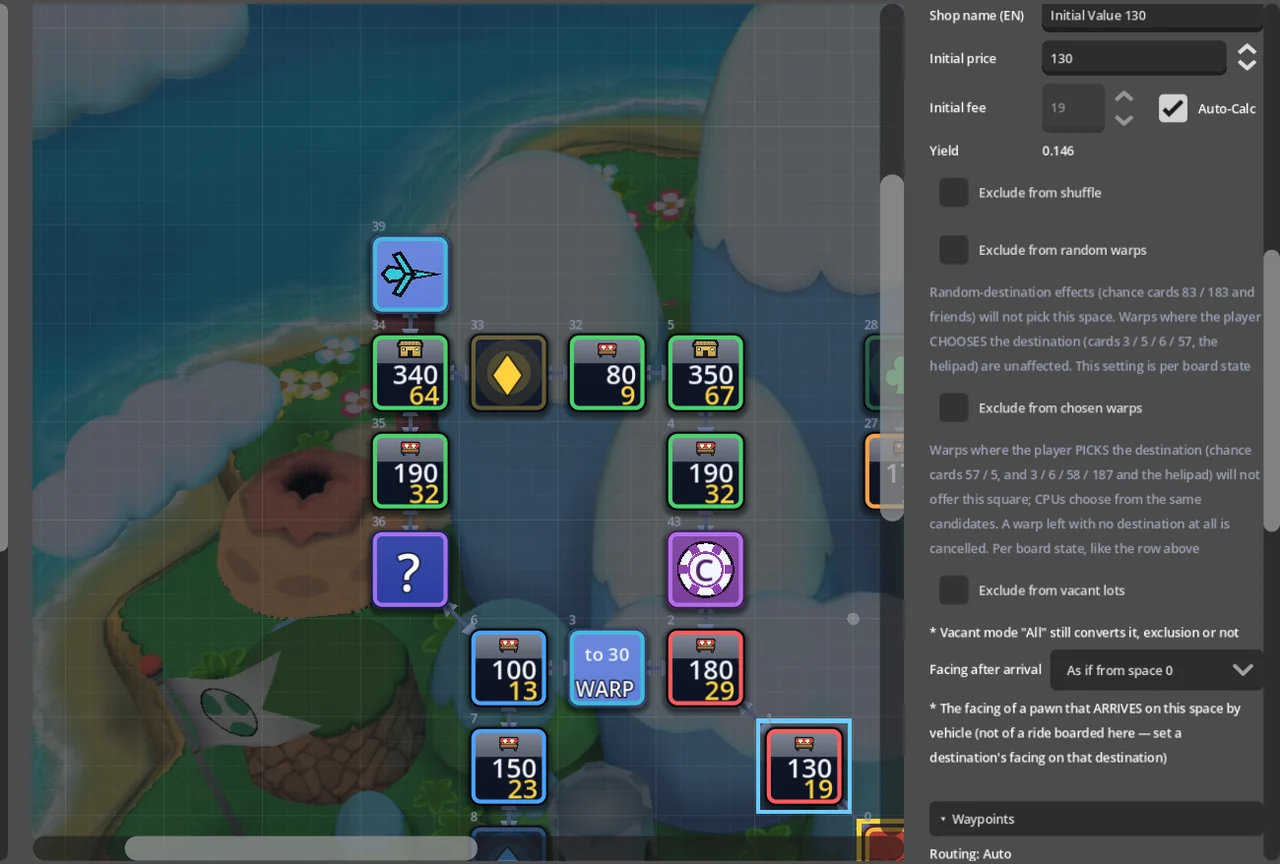
| Setting | On | Effect |
|---|---|---|
| Exclude from shuffle | Shops and lots | Keeps its own price and fee (and, under "All", its being a lot) while everything else swaps around it |
| Exclude from vacant lots | Shops | The Vacant lots rule never turns this shop into a lot (* except the rule's "All" level, which turns every shop regardless) |
| Exclude from random warps | Squares you can stop on | Never picked by cards that throw a piece to "a random square" |
| Exclude from chosen warps | Squares you can stop on | Never offered by warps where the player picks the destination (cards, the helipad). CPU players choose from the same list |
- The first two (shuffle, vacant lots) are shared by every state; the last two can differ per board state
- All four are off by default; a board that never touches them plays exactly as before
- How shuffle works in detail is in "Shop shuffle"
6. Board settings
The left panel's "Open board settings…" opens a window with four pages.
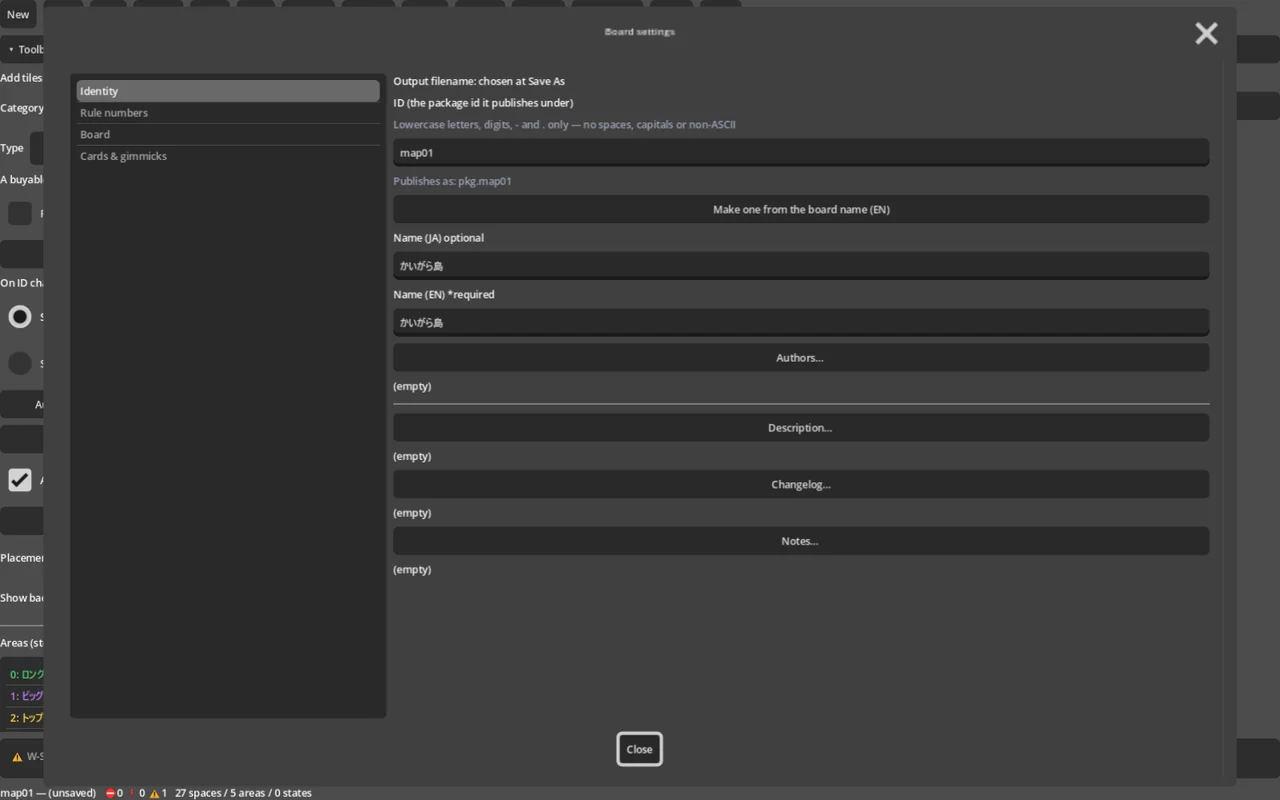
| Page | What is on it |
|---|---|
| Identity | Board ID, board name (JA/EN), authors, description, changelog, notes |
| Rule numbers | Max die, player count, goal, starting funds, base salary, level bonus |
| Board | Loop (none / vertical / horizontal / both) and floors |
| Cards & gimmicks | The 64-slot chance table |
- The board ID becomes the package ID when you publish (lower-case letters, digits and
-._; no spaces, capitals or Japanese). "Make one from the board name (EN)" builds one from the English name - Authors can be several people
- Description, changelog and notes can be written separately in Japanese and English (both optional; fill in either and it shows)
- The goal and starting funds under Rule numbers are what a match uses when the player leaves those rules on "Default"
6a. The chance table
The Chance Table under Cards & gimmicks is the 64 slots the board's chance cards are drawn from.
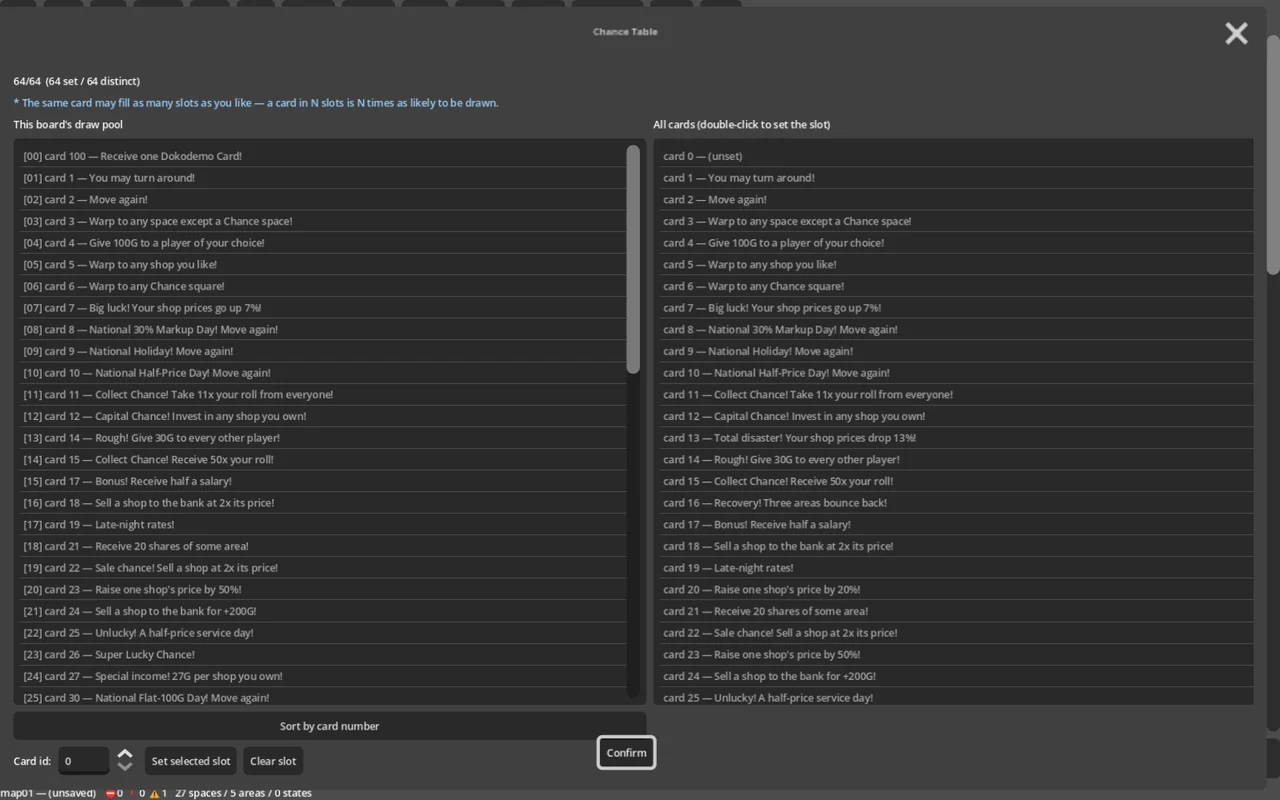
- Double-click a card in the full list on the right to put it into the selected slot. If you know the number, type it into Card id and press Set selected slot
- Clear slot empties a slot again
- A card may sit in as many slots as you like — each extra slot makes it come up more often
- The draw picks a slot at random, so the order never affects play. Sort by card number is only for reading
7. Board states (a board that changes mid-match)
A board state is a diff layer. Over the base "state 1", "state 2", "state 3"… hold overrides: this square is disabled, that one moved, this one is a different type. Step on a switch in the game and the board changes on the spot, with an animation.
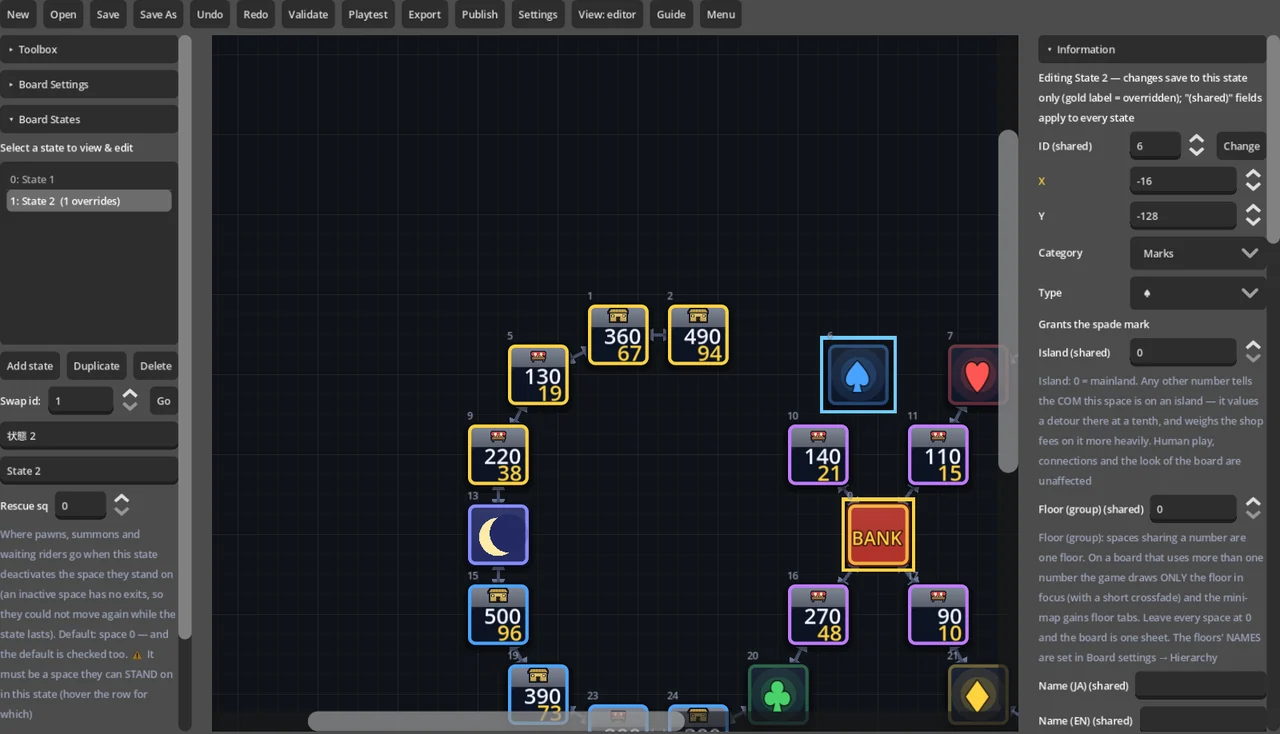
- The left panel's Board states section can Add state (a copy of the one before), Duplicate, delete and Swap id
- Pick a state in the list and the canvas shows the board as that state has it
- ⚠ How the numbering reads: names count from 1 (the base is "state 1") but the saved ID counts from 0. The list shows both as "ID: name" (
0: State 1/1: State 2…), and switch targets and validation messages all speak in IDs (the list can count from 1 instead, in the editor's settings) - A state takes a name in Japanese and English (English required). In a match, the current state's name appears beside the turn counter, top right
- Editing a state uses the same controls as state 1. An edit becomes an override for that state alone, and an overridden field's label turns gold. Put the value back to state 1's and the override is dropped by itself
- Fields marked "(shared)" — price, fee, shop name, district, ID — are common to every state
- Clear this square's overrides puts a whole square back to state 1
- Connections and waypoints can be edited per state too
- State sync copies one state's contents into others (standard = type and colour / position only / everything). Targets take ranges such as "1-5,7"
- Rescue square … where anything standing on a square this state disables is moved to.⚠ It must be a square a piece can stand on in that state (a disabled square, a door or an exit is refused and the board will not save). The default is square 0, so a state that disables square 0 must always name one
7a. Switches
Switch kinds: to a given state / random within a range / random overall / cycle a range / cycle everything (the default) — each with an optional "and everyone turns around". The state changes when the move finishes.
Besides the switch you stop on, three kinds fire just by being crossed (tile palette, "Gimmick"):
- Switch (on pass) — fires when crossed; the board changes once the move ends
- Switch (on pass, at once) — the board changes at the crossing and the rest of the move goes on over the new board. Stepping back puts the board back
- Switch (on pass + chance) — the board changes at the crossing, and stopping on it is a chance square (draw a chance card)
- An older on pass + chance square that switches after the move shows "(Older) Changes the board after the move — [Make it at once]" in the info panel (⚠ in validation). It is not changed automatically.
To change it once placed, pick another kind in the info panel's "Type".
- A switch has two colours — the square's background and the button's (an unset button takes the background's)
- Allow post-change board preview — in a match's map view, hovering a switch whose result is fixed and pressing S shows the board as it will be. Untick it and a "?" shows instead (random kinds always say "changes at random")
- Light transition (camera stays put) (pass switches only) — ticked (the default), the camera keeps following the piece and the squares simply move into their new places. Untick it when the change is big enough to deserve the full view
- On the board, a pass switch's button carries », and an on pass + chance switch a ?
8. Art and sound
A file is copied into the board's folder when you import it, and travels with the board.
8a. Images
The left panel's Assets (images) → Open image settings… opens a window of its own.
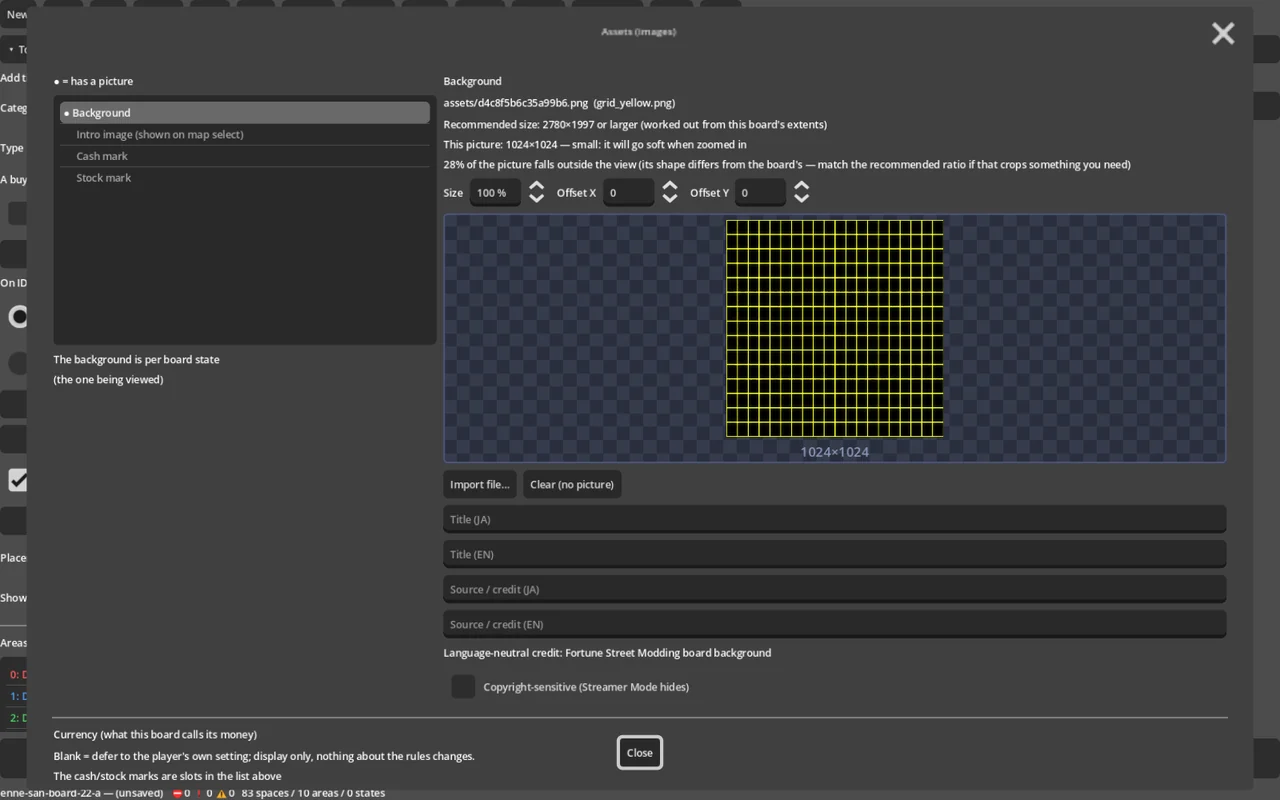
- Pick background / intro still (shown on the board list) / cash mark / stock mark on the left, and the picture itself appears on the right with its pixel size. Import file… / Clear (no picture) swap it
- The background shows a recommended size (worked out from how big the board is), and size and offset line it up. With a board state on view it becomes that state's own background; a board with floors can have a background per floor
- The intro still is the single picture on the right of the board-select screen. Something close to square fits best
- Currency — what this board calls its money — is set at the bottom of this window
- Images are png / webp
8b. Tile images
Open tile images… replaces the art per square type.
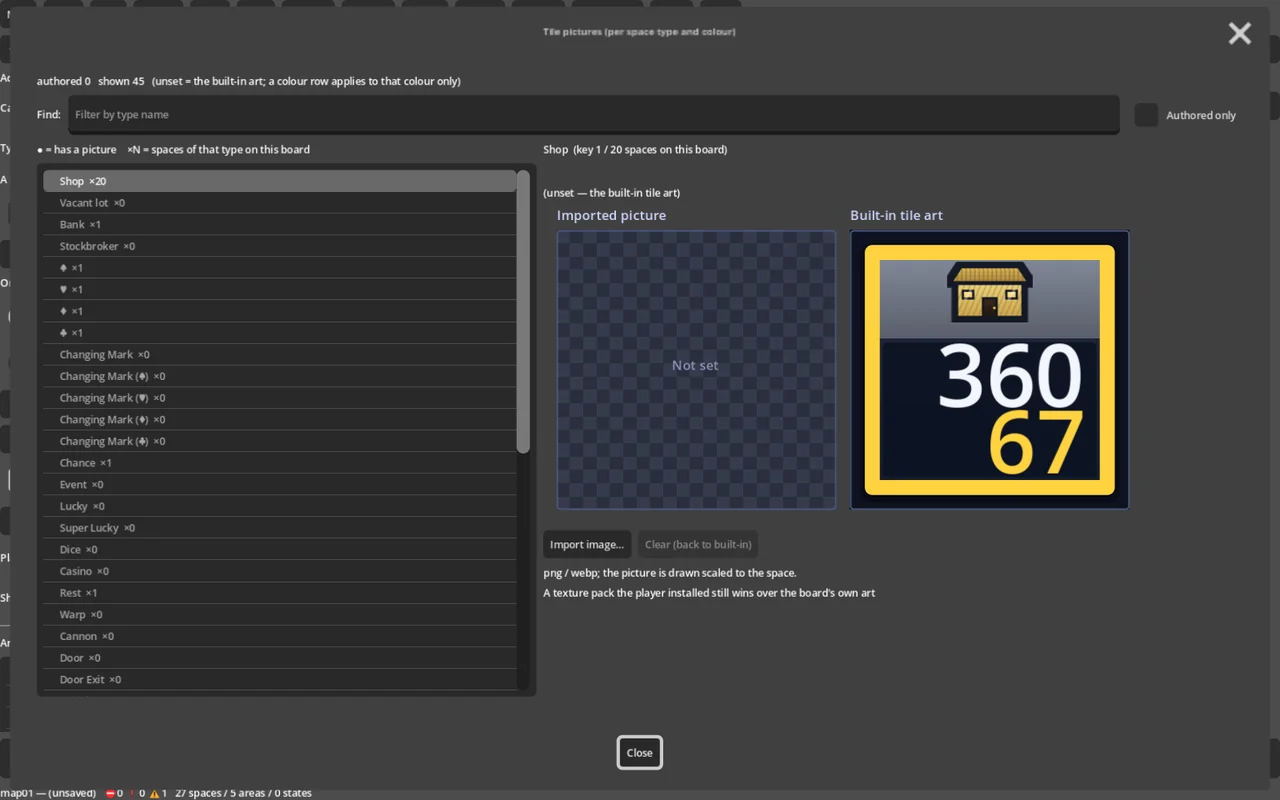
- Pick a type on the left and the right shows the Imported picture beside the built-in tile art (drawn from this board's real squares). Compare, then Import image… / Clear (back to built-in)
- ● in the list means set, ×N is how many squares of that type the board has. Types the board does not use yet still appear as a sample, so you can choose the art before placing the squares
- Types that carry a colour (warps, doors, cannons, switches, vehicles…) can differ per colour too (only the colours the board uses are listed)
- Even when the player has a texture pack on, the board's art wins by default
8c. Sound
Open sound settings… — every sound in the main menu's music settings can be replaced per board (90-odd slots).
- In the list, ● is set on this board and ◇ is inherited from state 1. Narrow it with the type (BGM / jingle / SFX), Look it up and Authored only
- Besides Import file…, From my library… picks from tracks you imported in the main menu
- Volume runs 0–400 (100 = as recorded) — for lifting a track recorded too quietly. ♪ preview plays at that volume. The number lives in the board, so everybody hears the same balance
- Anything that loops — all BGM and the four spinning SFX — must be
.ogg, because a wav clicks where it wraps (jingles and ordinary SFX take wav as well) - Set a sound while a board state is on view and it becomes that state's own sound
A slot you leave empty falls through to the player's own music settings, then their sound packs, then the default track. A board's choice outranks the player's, so set only the slots you really mean to fix.
8d. Titles, credits and Streamer Mode
Images and sounds alike take a title and a source / credit, separately in Japanese and English (all optional). A player sees whichever is written first in the order: their language → English → Japanese.
An asset flagged Copyright-sensitive is hidden or substituted automatically when the player turns Streamer Mode on. Flag every track or picture that cannot go out on a stream.
9. Validate, play-test, save
9a. Validate
Validate (it also runs as you edit) lists problems in the bottom dock. Click one to jump there.
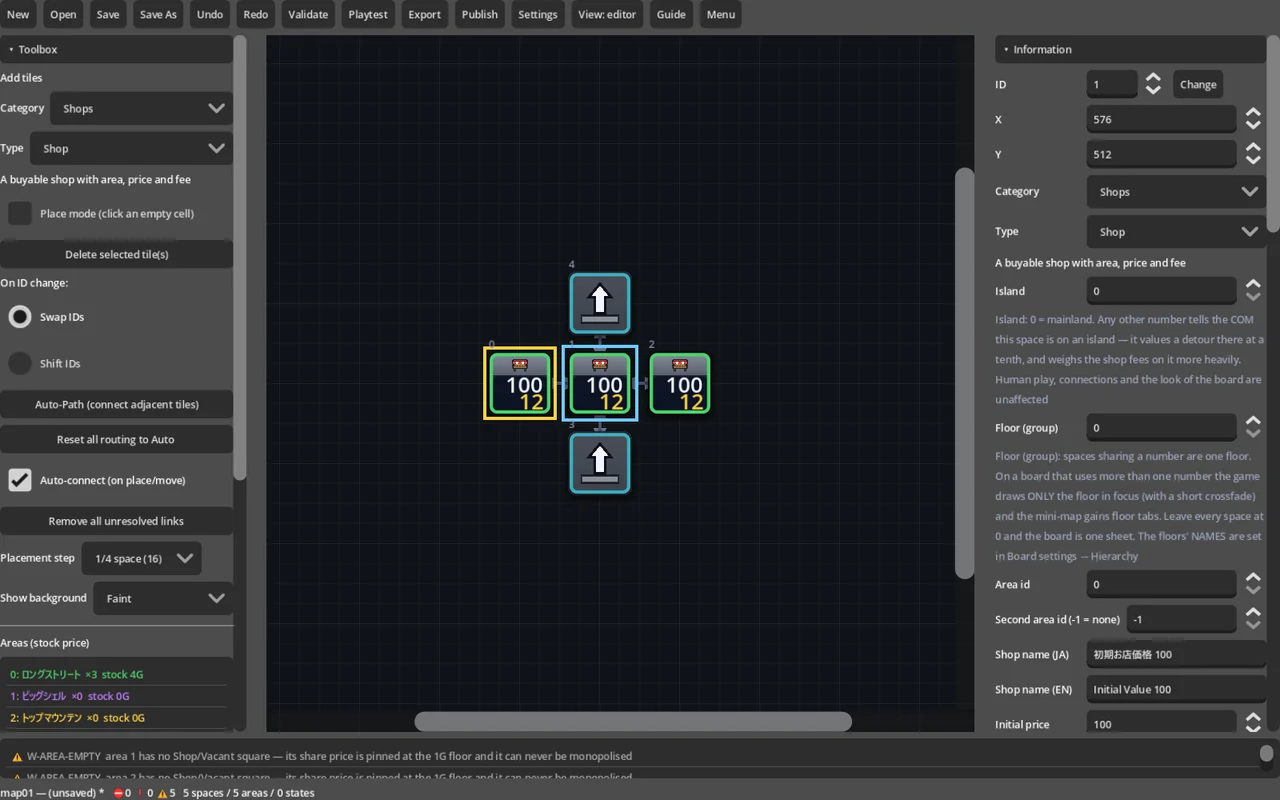
| Mark | Meaning |
|---|---|
| ⛔ Fatal | Will not save (duplicate coordinates, a broken reference) |
| ❗ Error | No play-test and no export (a draft still saves) |
| ⚠ Warning | It works, but look at it (a one-way warp, an unresolved connection, no bank) |
The dock can show more lines — Settings → Warning/error lines shown. The bottom line always carries the ⛔ ❗ ⚠ counts.
9b. Play-test
Play-test (F5) — set the player count, goal and starting funds, then give each seat to a CPU, the keyboard or a controller. These values are for the play-test only and never touch your main-menu setup.
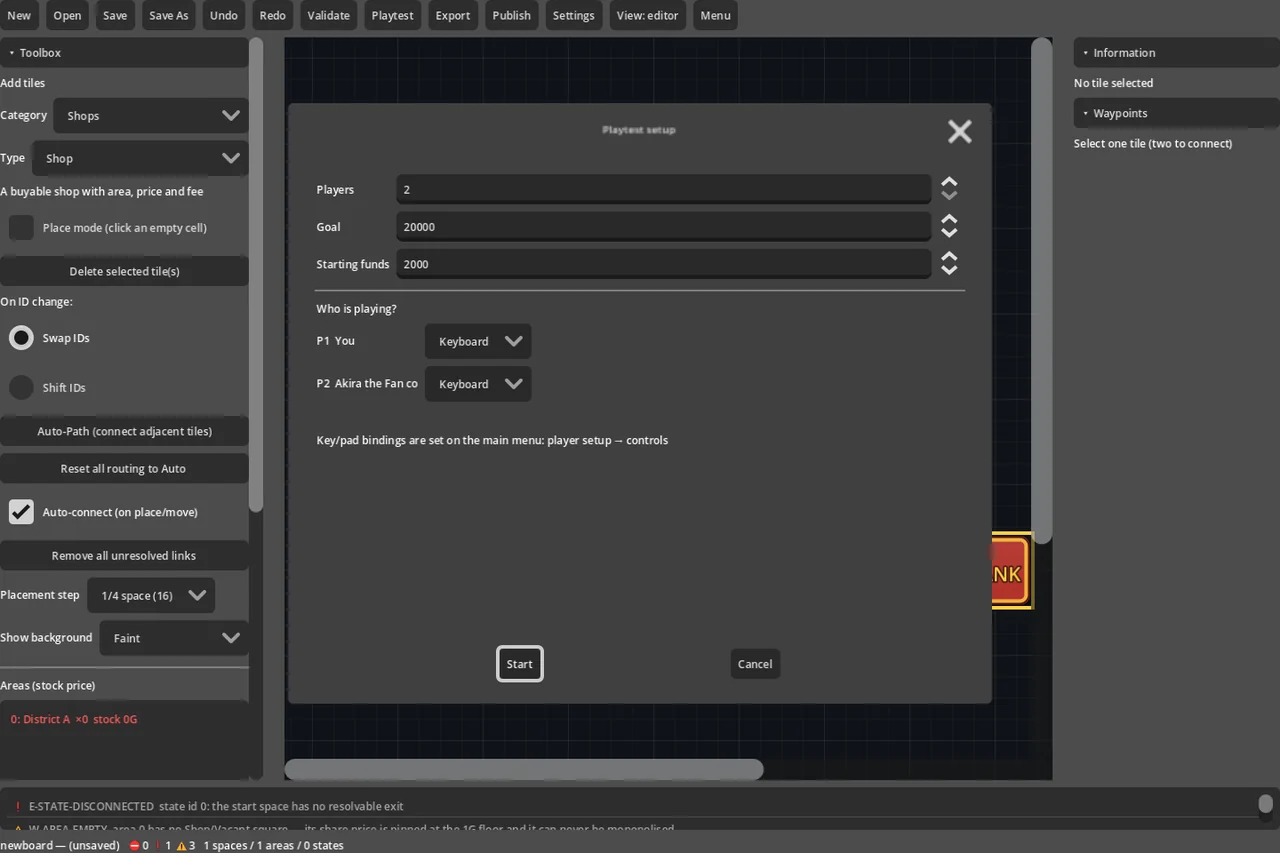
- Try it alone against CPUs, or two of you at one machine
- ⚠ At least one seat must be a person — with everyone on CPU there is no way back to the editor
- The pause menu's "Back to editor" returns you with your edits and your undo history intact
9c. Autosave
Autosave (on by default) writes unsaved work to a file of its own every few minutes.
- It never rewrites the board file you have open — only "save" does that
- The last autosave time is on the bottom line. The interval is in the editor's Settings (30–900 seconds)
- If one is left over the next time the editor opens, Recover autosave asks whether to open it. "Later" keeps it; a successful save is what removes it
9d. Save
- Save (Ctrl+S) needs the English board name. The first save offers a folder of the board's own inside the
boardsfolder — keep it, and the board appears in the board lists (the editor's Open and the board you play on) - Saved anywhere else it is not listed (the editor says so) but still opens with "Open from a file…"
- Saving into another folder copies the imported assets along with it
- ⚠ A board saved in 1.3.0 that uses newer settings (such as Step off) may not open in 1.2.1 or earlier
10. Sharing and publishing
10a. Export (handing over a file)
Export writes a distributable package (.espkg) with every referenced asset inside (validation errors block it).
An exported .espkg can simply be handed over: the other player drops it on the window, or takes it with I under Downloads & Account. A board installed that way gets no updates and cannot be reviewed — it did not come from the service.
10b. Publish (to the official server)
Publish uploads straight to the official server. Nothing needs setting up first.
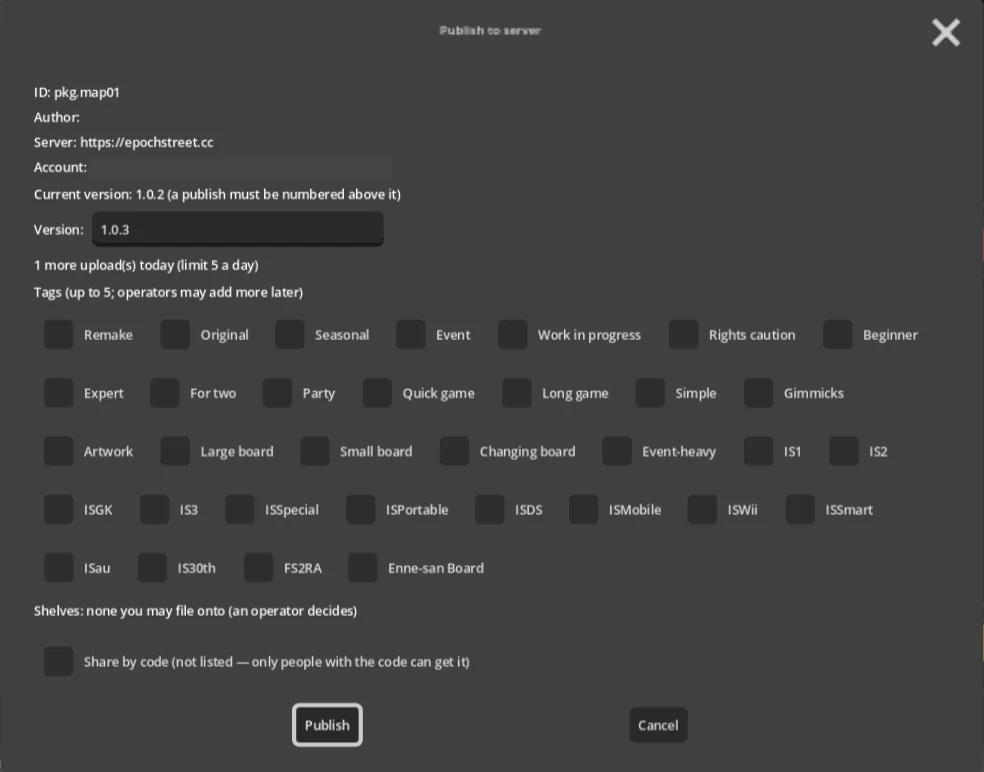
- The confirmation dialog's Current version is the version you published last, and the Version field already holds the next number. The same number, or a lower one, is refused (before anything is sent; the dialog stays open)
- Pick up to five tags ("For two", "Quick game", "Gimmicks" and so on). They drive the filters on the download screen and the site's board list. "Featured" and "Official" are the operators' to give, so they are not on the list
- Press Publish and an uploading window shows how far it has got
- Depending on the server it may land in review and appear once approved
- A board with copyright-sensitive assets gets a ⚠ in the confirmation dialog
- Your first publish quietly creates an anonymous account for that server (no email, no password). ⚠ Moving to another machine means issuing a transfer code from the Account button in Downloads & Account first. Lose the machine without one and the account cannot be recovered
10c. Share by code
Tick Share by code in the publish dialog and the board is not listed anywhere: only people with its share code can get it. The code is shown, and copied to the clipboard, once the publish is accepted.
- They take it with By code (see "Downloading")
- To list it later or make a new code, use Downloads & Account → C (Account) → My uploads
- A published board reaches other players through Downloads & Account → "Importing"
11. When something is wrong
| What you see | Usually |
|---|---|
| Squares will not connect | One is half a step off. Line it up, or connect it by hand in the waypoint panel |
| A red "unresolved!" | A connection with nothing at the other end. "Cut", or "Remove all unresolved links" |
| It will not save | Check the English board and district names, and every ⛔ |
| No play-test, no export | A ❗ is left. Click its line in the dock and fix that square |
| A board I saved is not in the lists | It was saved outside the boards folder's own board folders. Open it with "Open from a file…" and save it again with "Save As" (the offered folder is the right one) |
| The loop does not loop | A square is not on the outermost row/column, or a seam was drawn by hand (→ §3c) |
| Pieces will not take the road I drew | Look for a yellow ※ on the connection — it is in no waypoint row's "to" list (→ §3b) |
| An edited state looks unchanged | Check that the state is selected in the list, and that something in the game (a switch) switches to it |
| Publishing is refused | Check the version is above "Current version", and that no ❗ is left |
12. Shortcuts and editor settings
| Key | Does |
|---|---|
| Ctrl+Z / Ctrl+Y | Undo / redo |
| Ctrl+S | Save |
| Ctrl+W | Back to the menu |
| F5 | Play-test |
| Del | Delete the selected squares |
| P | Auto-path |
| Wheel / middle-drag | Zoom / pan |
| Ctrl+drag | Move in single-unit steps |
The top menu's Settings changes the editor itself:
- Language (日本語 / English)
- Font size (menu bar & panels) (4–24) — the side panels' text; the panels widen to match
- Font size (windows) — the separate windows (board settings, tile images, sound…). 0 = the same as the editor
- State numbering — whether the list counts from 0 or from 1 (display only — the file never changes)
- Warning/error lines shown (1–10)
- Autosave on/off and its interval (30–900 seconds)
- BGM volume / SFX volume (previews too)